
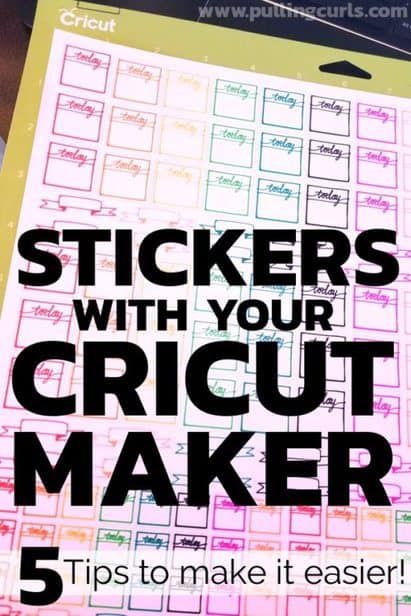
I’ll be honest. I just had a ROUGH time doing Cricut’s print then cut stickers on my new Cricut Maker. Today, I want to share five tips for YOU to make Cricut stickers with your Cricut Maker — and hopefully not have a rough time like yours truly. 🙂 As a sticker lover, it’s one of my favorite things to use stickers on my planner and an easy way to personalize water bottles, journals, notebooks, and more!
Full Disclosure: This is a sponsored conversation written by me on behalf of Cricut. They sent me the machine and some of their products, with no requirement the post be postiive. The opinions and text are all mine.
Can import your own images in from other programs to make Homemade Stickers with your Cricut Maker machine
I imported my own image from my silhouette software (the business edition) as a png file and it worked really well.
First thing, a few tips:
- For best results make sure that you have a white outline beyond your sticker so that the program knows where to cut. Make it at least one pixel.
- Once your stickers are done hit “attach” so that it doesn’t move them all around.
- PNG is probably the best way to convert from if it has a transparent background, but you can use svg files also.
Looking to learn more about adding a white border — check out this video.
Cricut sticker paper doesn’t work in my printer
Their white sticker paper is REALLY thick. I tried a few things, and my husband tried a few things — with no luck. I was actually talking with a friend who got it jammed in hers that same day too.
I LOVE it for the hand-drawn custom stickers I made — but I am not sure I’d put their brand through my printer again. I think if I used my straight feed in — it would work. But the way my printer is set-up that is pretty hard….
If Cricut printable vinyl or sticker paper doesn’t work for you, try different materials or different sticker paper to find the best sticker paper for your printer.
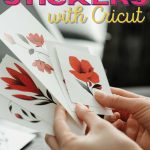
Hand-drawn stickers are SO cute
I LOVE using their pens to make my own stickers. I really wish I was a great artist, but I’m not. It gives my planner more of that “bullet journal” feel without me having to have any actual skills beyond changing markers frequently.
Don’t discount using markers in your cutting machine — it gives a really polished look as well!
I used these pens to make it. You just pick sticker design images in Cricut that seem “hand drawn” and put them where you’d like on your sticker sheet. Don’t feel constrained to what I put for colors, just pick ones YOU like!
Adhere Sticker Paper Well to your Cricut Maker Mat
When you’re putting the printable sticker paper in the machine (you can use the Maker or the Cricut Explore Air), use a scraper to adhere it well to your cutting mat. Mine peeled up on my first try, and it wrecked the stickers before it cut.
On my last attempt, it started to peel up — I used some washi tape to the very edge (so it wouldn’t interfere with cutting). It made sure it stuck well.
I have heard you can wash these mats with some mild dish soap to get their “sticky-ness” to come back, but be careful. You can use that washi tape trick too, or just buy a new mat.
When you don’t use Cricut products, beware
The Cricut Design software makes it easy! BUT, it is set for Cricut brand products. That means when I used another brand of sticker paper (that I could get to go through my printer) it didn’t kiss cut — it just cut, even though I had set it to use less pressure on the cut setting.
I would need to test out the amount of pressure I should use with that particular brand. At that point I gave up — but I plan to work on it in the future. 🙂
The reality is that you are GOING to have some trial and error with your machine. Also, making stickers (no matter what machine you have) can be hard. You have the printing, and sticker paper — along with the kiss cut, and each area can be difficult!
It’s nice to have so many bloggers behind the scenes making mistakes so you don’t have to — but stuff will happen, and that is just part of the crafting journey.
Just act like it’s an experiment and you learned a new way to NOT do something. 🙂

Cricut Print then Cut for Stickers FAQ
Q. What is the best Cricut machine for making stickers?
A. I used the Cricut Maker, but I know that you can also use the Cricut Explore machines too. Whichever machine you feel most comfortable using is probably the best one for you. Print then cut is not available on Cricut Joy, but you can use pens to draw your own custom stickers and then cut it.
Q. Why does Cricut print a black rectangle around my cut image?
A. The black lines around the cut designs you print are called registration marks. They create a black box so the machine can line up the printed sheet with the cut feature to make sure that your cut line is cutting in the right place.
Q. What is the best home printer for making stickers?
A. You need to make sure that you use an inkjet printer for printing on Cricut printable material. It’s helpful to read reviews on print quality.
Q. What is the maximum size for print then cut?
A. You can now go up to a maximum design size of 10.64″ x 15.44″ on tabloid paper.
Q. Are there any fun stickers that are premade?
A. Yes, you can use your own design using upload image in Design Space or use the free sticker designs. If you have Cricut Access you will have a lot more options for individual stickers.


ALAN says
How do I do text with a border around it ???
Hilary Erickson says
Hmmm, I’m not sure what you mean…. You mean cut around the sticker?