
I know when I think of dutch oven cooking I tend to think of slow cooking items. Mostly savory foods that often have dirt in them (thank you 4th grade pioneer trek). But, since my husband has totally gotten into dutch oven cooking (you can see our first post about outdoor cooking) we have been enjoying TONS of different dutch oven recipes!
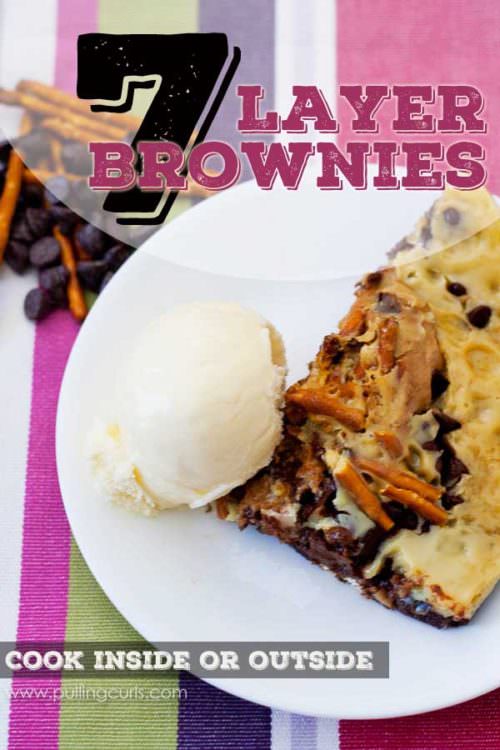
Brownies in a dutch oven — you might ask? Are they soggy and sad? The answer: No. They are AMAZEBALLS. Literally one of my favorite deserts of all time!
I am excited to share the recipe with you. The BEST part of this recipe is that you can make your 7 layers whatever you want. Dutch Oven is very forgiving. Our family isn’t a fan of coconut (don’t hold it against us) so instead we tried some other things.
We first found this recipe on Dutch Oven.net here. FYI, the brownie can be made with a dutch oven or a regular oven.
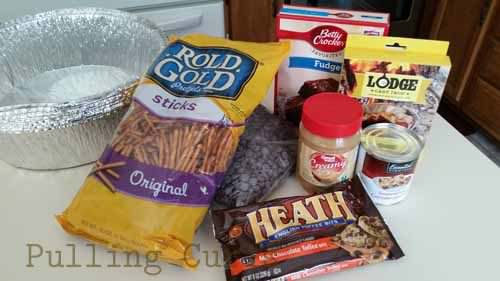
We love that this 7 layer brownie has pretty simple ingredients. You can use stuff your family has around anyway to make this delicious dessert.
1 box dry brownie mix (any kind seems to work)
½ cup melted butter
1 egg
1 tsp vanilla
——— Here’s where you get to pick your favorites.
1 cup toffee chips
1/2 cup peanut butter
1 cup semisweet chocolate chips (or whatever kind your heart desires)
1 cup chopped pretzels (we tend to put ours in a bag and let the kids have their way with it, you don’t want small bits, you do want pieces of pretzels)
1 cup of anything else that sounds delish…. (sprinkles, other types of chips, nuts, graham cracker bits, oreo bits, M&M”s, etc).
½ cup + 2 TBL sweetened condensed milk
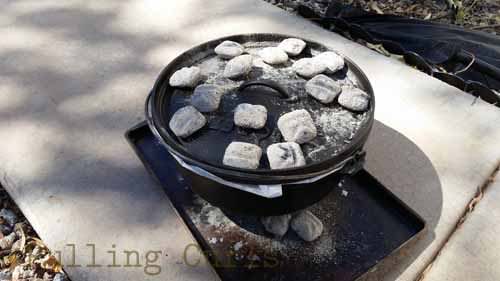
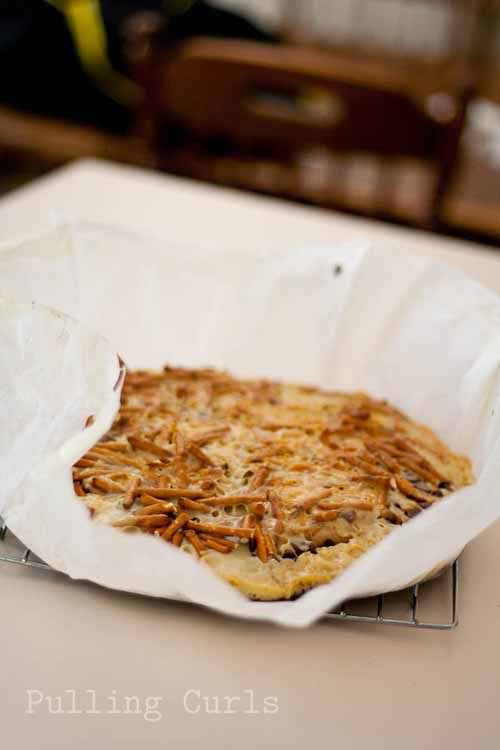
If cooking indoors, preheat oven to 350 degrees. If cooking with charcoal, use 9 hot coals on the bottom and 12 hot coals on the top of the dutch oven. Use a parchment paper dutch oven liner to easily remove the brownie once it is done cooking. It also makes for a beautiful presentation.
**A word about coals. I prefer to use lighter-fluid-free charcoal briquettes and using the HomeRight fire starter. It makes my coals ready within a few minutes (sans lighter fluid taste/smell — extra bad with baked goods) instead of needing to wait a half an hour for them to all get an ash layer. If Dutch Oven cooking is something you do frequently (or wish you could do MORE frequently), I totally recommend checking it out!
Be sure to check out our full post on dutch oven & outdoor cooking.
We generally choose a fudge or milk chocolate brownie as the base for the brownie (layer one) Mix it up in a bowl (you could always use a stand mixer — something like a Bosch or a Kitchenaid), or if you are out in the woods, mix it up in your warm dutch oven after you soften or melt butter. Once the brownie mixture is ready, spread it out to cover the bottom of the dutch oven and cook it for 14-15 minutes. Remove the Dutch oven from the heat and uncover it.
7 Layer Brownies
Now it’s time for the layers. If you’ve ever heard of 7 layer bars, you’ll know they are a delicious, sweet dessert. These homemade brownies are similar, but use the brownie as the “crust” instead of a graham cracker crust. These are the perfect campfire brownies because you can have them cooking while you are just hanging out and visiting.
You’re going to alternate layers of dry ingredients (things like graham crackers, pretzels, Oreos, coconut, pecans, walnuts)
with wet layers (chocolate chips — because they melt, peanut butter, marshmallow creme, caramel)
And then finish with the sweetened condensed milk, leaving about an inch of clear space around the edge. You can see what we did in our handy-dandy video:
As you can see from the pictures, the wetter ingredients (peanut butter and sweetened condensed milk) fill in that inch space very nicely. Put the dutch oven lid back on, return to the heat and cook for 30-35 minutes. The cooking stage is complete when a toothpick inserted in the middle comes out clean.
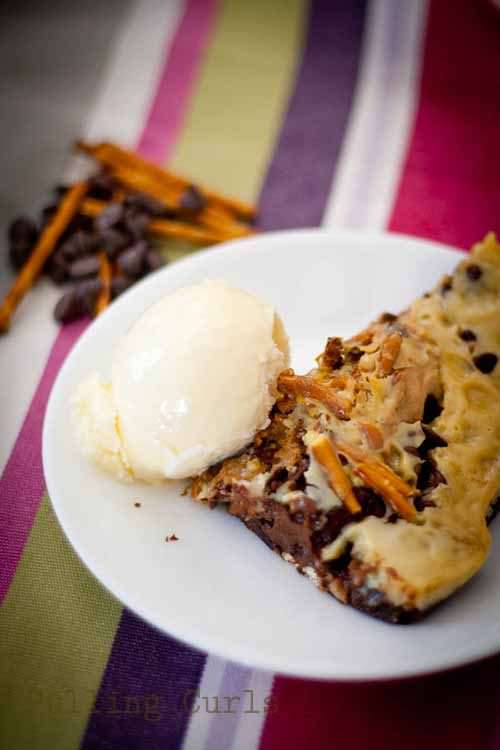
Now, it is understandable that you want to just dive right in and eat the brownie straight out of the dutch oven. However, give it about an hour or two to cool. It will still be warm enough to melt ice cream, and the caramelized sweetened condensed milk will have a chance to set a bit more. You won’t be disappointed. We enjoy our brownies with a scoop of vanilla ice cream, perhaps homemade chocolate sauce. Once finished, we also enjoy a nice food coma. 🙂
This easy recipe is perfect for your next camping trip and is a perfect dessert to take care of that sweet tooth while you’re enjoying the outdoors.
Almond Joy Brownies
If you are feeling like the 7 layer brownies are a little too much, you can simplify them by making Almond Joy brownies.
You can cook your brownies the same way, let them cool a little bit while you mix your sweetened condensed milk with coconut flakes. Once your brownies are cool, you can spread the coconut mixture on top of the brownies, sprinkle almond slices on top and drizzle with melted chocolate. It’s an easy dessert that will hit the spot for chocolate lovers!
This post was sponsored by HomeRight. Big thanks to them, and their love for Dutch Oven Cooking! I love working with them and how much they love creativity!
Check out all my Outdoor cooking posts:
[pt_view id=”124befce58″]


Kristin Rathjen says
First time I’ve found your site and these brownies look amazing. I was trying to print it so I’d have the recipe to take with me, but I can’t seem to find a print button that bypasses all the “extras” and prints a clean copy, usually single page. Do you not have that on your site or am I just missing it?
Pulling Curls says
I actually don’t have a recipe card for this post, I apologize for that. I will see what I can do to get these changed over in the near future 🙂